
It happens every single day at my Battambang salon, especially when the rainy season hits, and clients want a playful pop of color, stare at hundreds of polish swatches on the wall, and sigh because they have absolutely no idea what design to get next.
We have all been there.
Endlessly scrolling through social media for inspiration can feel completely overwhelming, especially when you are tired of the usual French tips or simple florals, but do not want anything too complicated or time-consuming.
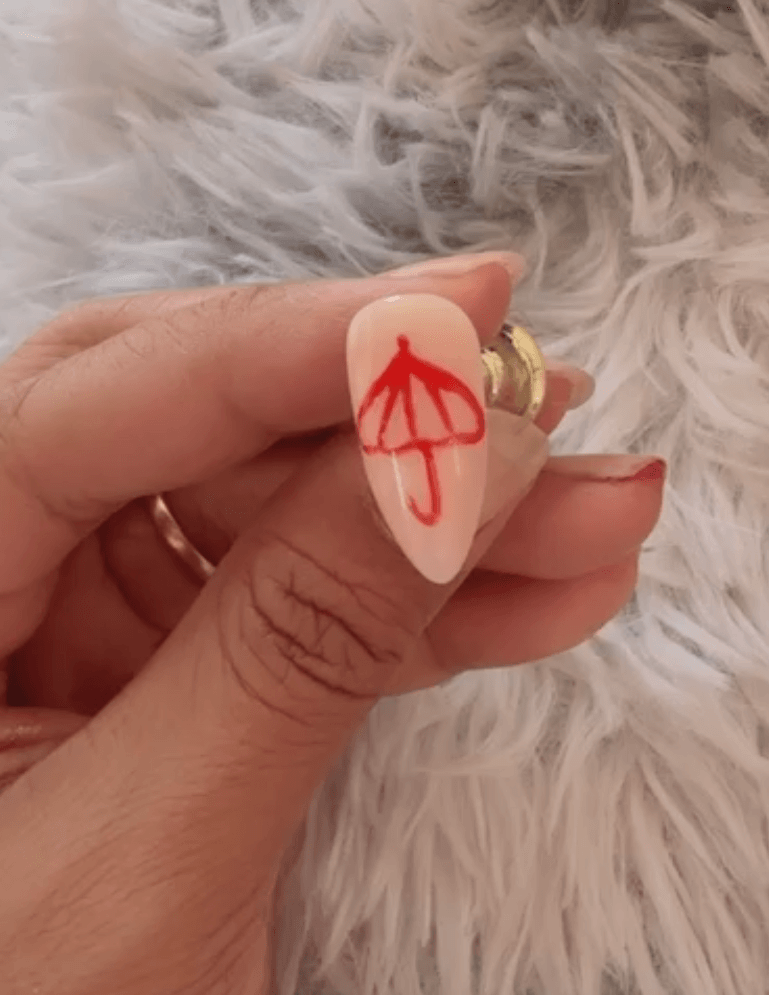
If you are stuck in a nail art rut and need a fresh spark of inspiration, I have the perfect answer for you: this cute red umbrella nail art design.
It is unexpectedly chic, delightfully playful, and, honestly, the best cure for nail-design builder’s block I have found this year.
The minimalist freehand design sits beautifully over a clean, translucent nude base, and the best part is that it is far easier to recreate than it looks.
Whether you are a fellow nail tech searching for a quick, salon-friendly option or doing your own nails at home, let me walk you through every single step.
A Quick Look at This Design
Before we get into the full tutorial, here is a quick summary if you are short on time:
- This is a minimalist red umbrella nail art design painted freehand on a nude jelly gel base.
- You only need five products: a base coat, a nude jelly gel, a red color gel, a fine liner brush, and a glossy top coat.
- The whole design can be done at home with a basic UV/LED nail lamp.
- Almond and stiletto nail shapes frame this look beautifully, though it works on any shape.
- You can swap the red for pink, coral, or pastel to make it your own.
- This tutorial works for both complete beginners and professional nail techs.
Why This Design Fits 2026 Nail Trends Perfectly
Nail preferences in 2026 have shifted toward something more intentional and refined.
Searches for the “minimal manicure” have surged recently—I have painted more minimalist jelly bases this month than all of last year combined.
Clients are asking for clean, translucent bases with a single pop of freehand nail art, and that is exactly where this design lands.
The nude jelly base keeps things modern and light, while the red umbrella adds just enough personality without tipping into maximalism.
It photographs beautifully under natural light and works just as well for a casual lunch as it does for a client who wants something unique but still wearable every single day.
Red is also a nail color that never fully disappears from trend cycles.
In 2026, bold accent art in red on a jelly or nude gel base fits perfectly into the broader clean girl aesthetic that continues to dominate salons and social media feeds alike.
If you have been wondering what nail designs are trending this year, understated freehand art like this is one of the most consistent answers out there.
Tools and Products You Will Need
Before you start, gather everything in one place.
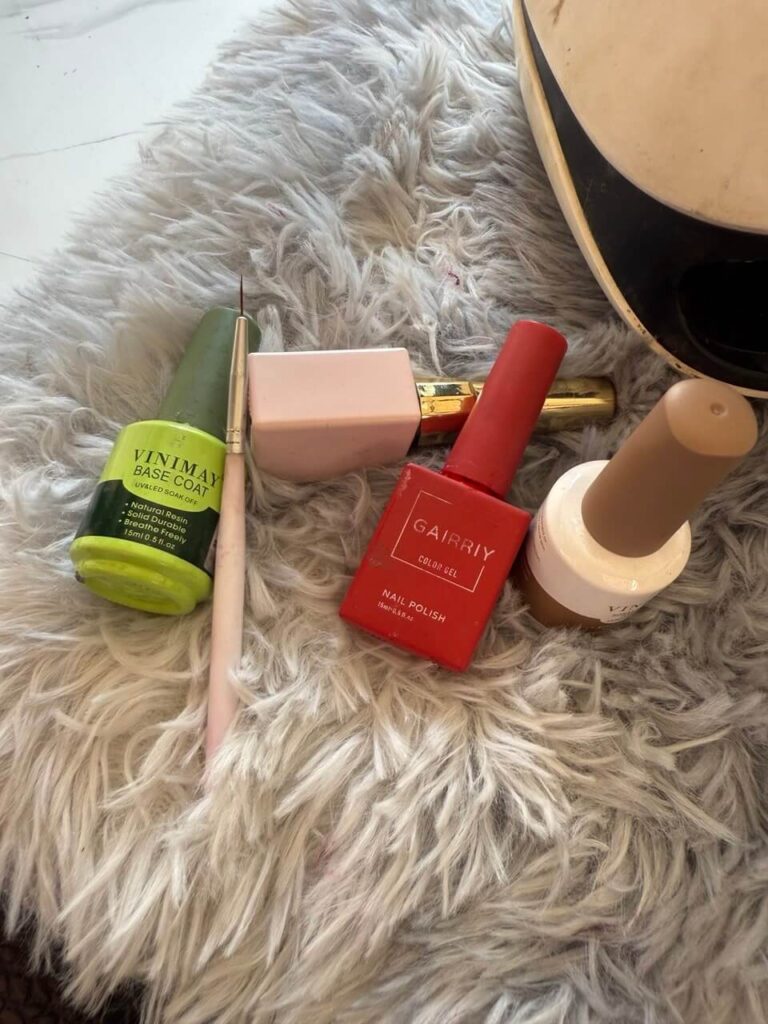
Having it all within reach makes the process far smoother, especially once your gel is uncured and the clock is ticking.
- Base Coat: Vinimay Base Coat (UV/LED soak-off)
- Background Color: Nude/Jelly Gel
- Art Color: Gairriy Color Gel in Red
- Brush: Fine Liner Nail Art Brush
- Finish: Glossy Top Coat
- Equipment: UV/LED Nail Lamp
One tool that makes the biggest difference here is the fine liner brush.
If the bristles are splayed, fraying, or too stiff, your umbrella lines will come out uneven and difficult to correct.
Investing in a quality liner brush before attempting any freehand nail art is worth every penny, and it opens up a whole world of gel nail designs beyond this one.
How to Create the Red Umbrella Nail Art Step by Step
This easy gel nail art tutorial walks you through the complete process from bare nail to finished design.
Each step builds on the last, so do not skip ahead.
Step 1: Prep Your Nails
A well-prepped nail is the foundation of any long-lasting manicure.
Trim and shape your nails to your preferred look.
Almond and stiletto shapes frame this delicate design particularly well, though it reads beautifully on square and oval shapes too.
Gently buff the surface of each nail, then clean it thoroughly to remove any dust, oils, or moisture left behind.
Even a small amount of residue on the nail can affect how well the gel bonds, so take your time here.
Step 2: Apply Your Base Coat
Apply an even, thin layer of Vinimay Base Coat to protect the natural nail from staining and give the gel layers a clean surface to grip.
Cure under your UV/LED nail lamp for 30 seconds.
Keep the layer thin and cap the free edge as you apply it to prevent any early lifting around the tips.
Step 3: Build the Jelly Base
This is the step that gives the entire design its fresh, glass-like quality.
Apply your first layer of Nude/Jelly Gel and cure under the lamp for 30 seconds.
Follow with a second layer and cure again for another 30 seconds.
The two layers build a soft, semi-translucent depth that makes the red freehand art truly pop against the natural undertone of the skin underneath.
If you have ever looked at a set of jelly gel nails and wondered how they achieve that signature gummy, glowing finish, this double-layer technique is exactly how it is done.
The sheer color keeps the manicure clean and natural while still adding real dimension to the nail.
Step 4: Draw the Umbrella
This is the step most people feel nervous about before they try it, and every single time, they are surprised by how manageable it turns out to be.
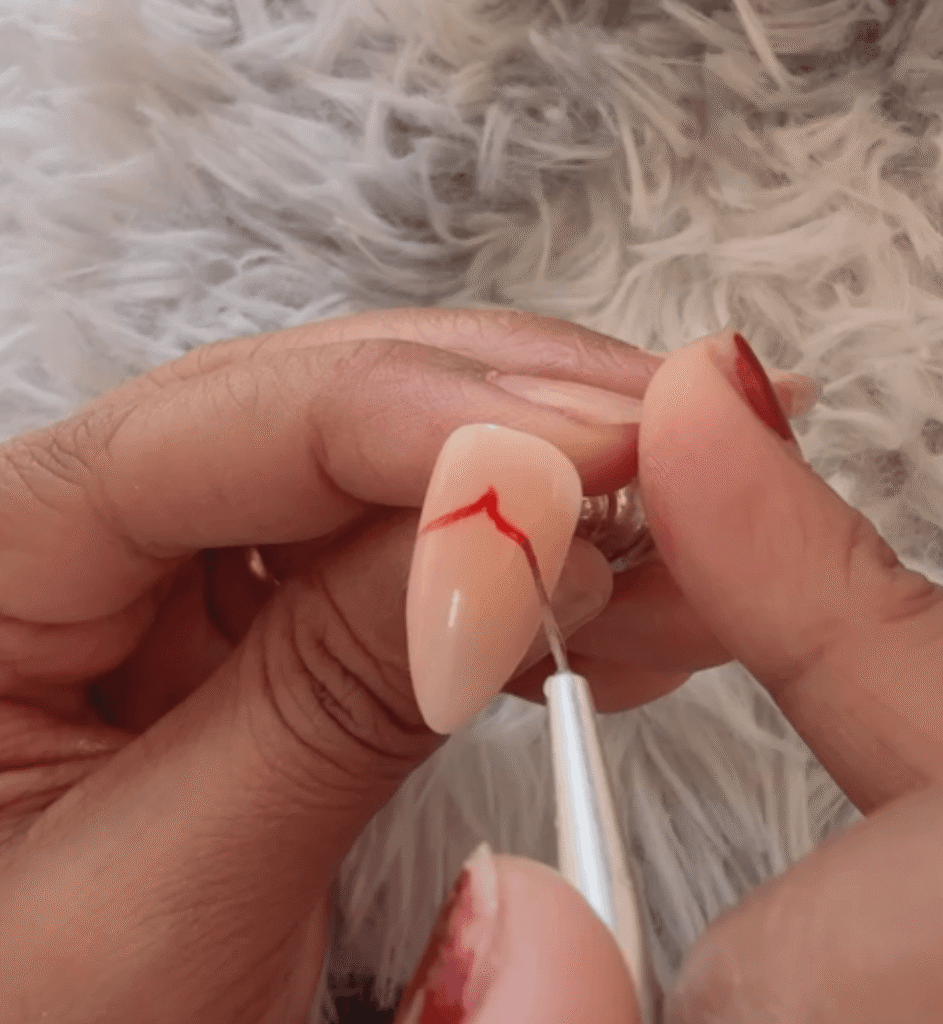
Dip your fine liner brush into the Gairriy Red Color Gel and wipe off any excess on the rim of the pot so you have clean, precise control over the bristles.
Starting near the top center of the nail, draw the curved dome of the umbrella by sweeping the brush from one side to the other in a smooth arc.
This is your first stroke, and it sets the scale for the whole design.
Come back in and add the scalloped edges along the bottom of the dome by drawing small connected curves beneath it.
Then draw a straight vertical line downward from the center of the pole, and finish with a small outward curve at the base to create the hook of the handle.
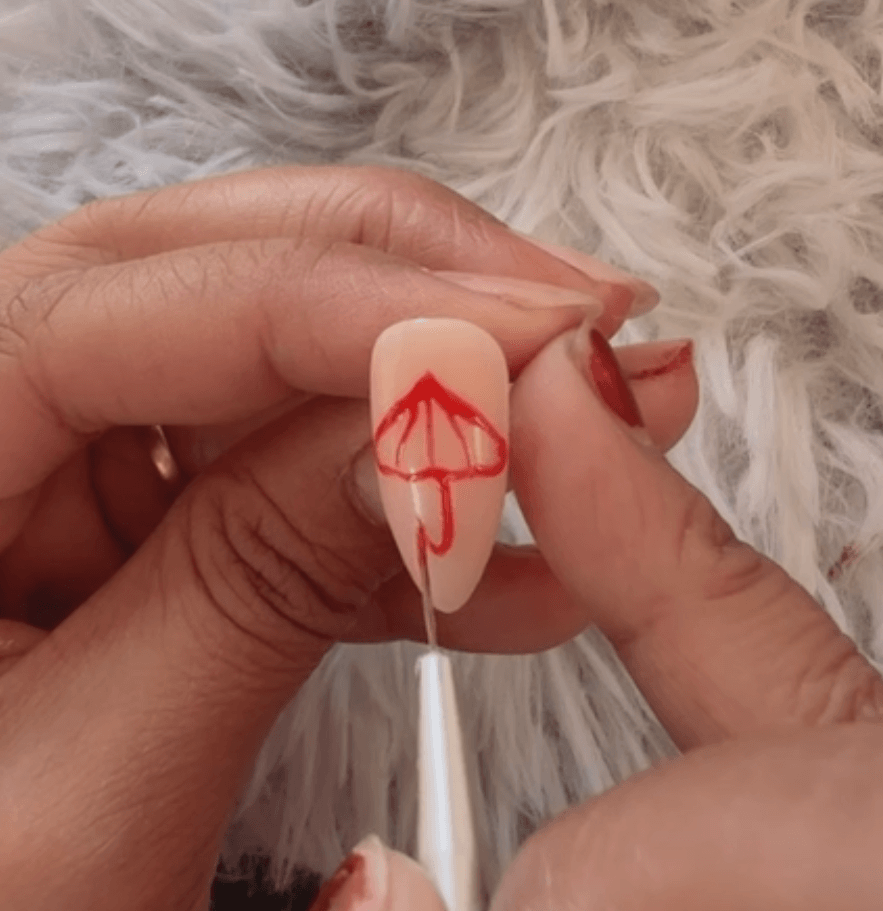
Take your time through this step.
Because the gel does not dry until it goes under the lamp, there is no pressure at all.
If a line comes out shaky, simply wipe it off with a small clean brush or a cotton-tipped tool dipped in cleanser, and start that stroke over.
Once you are satisfied with the shape, cure the design under the lamp for 30 seconds to lock it in place.
One thing I always tell clients who watch me do this: the lines do not need to be perfectly symmetrical to look good.
The slight handcrafted quality is actually a big part of what makes freehand nail art feel special rather than printed or stamped.
Step 5: Seal and Shine
Apply one or two layers of your Glossy Top Coat over the completed design, depending on how much shine and thickness you prefer in your finish.
The top coat seals the hand-painted art, adds a beautiful glass-like sheen, and protects everything underneath from chipping or fading.
Cure one final time under the lamp, and your umbrella nail art is complete.
Pro Tip from the Salon
Red is the classic choice for this design, and it consistently turns heads, but do not feel locked into a single color.
Many of my clients love to swap it out for bright pink, soft coral, dusty lilac, or a deep wine shade to match whatever they are wearing that week.
The minimalist freehand style adapts beautifully to almost any gel color in your collection.
This is also a fantastic design for nail techs who need a client-ready option that is quick to complete on a busy salon day but still looks polished and impressive in a portfolio photo.
I have had clients in their early twenties specifically request this look because it feels personal and unique without being too bold or high-maintenance for daily wear.
More Minimalist Nail Art from My Studio
This cute red umbrella nail art design is one of those looks that seems more complex than it actually is, which makes it a real win whether you are working from a home nail setup or adding something fresh to your salon menu.
With a handful of products, a steady fine liner brush, and a jelly gel base, you can create a minimalist gel nail design that feels current, handcrafted, and genuinely eye-catching on any nail shape.
Give this step-by-step umbrella nail art tutorial a try and let me know how it turns out in the comments below.
And if you are hunting for more easy freehand nail art ideas like this one, there is plenty more coming to the blog very soon.
Troubleshooting This Design: Questions My Battambang Clients Ask
How do I fix a wobbly umbrella line without ruining the jelly base?
If your line comes out shaky, do not cure it! Because you already fully cured the jelly base in Step 3, you can simply use a clean nail art brush or a lint-free wipe dipped in a little alcohol to gently erase the wet red gel. The cured jelly base underneath will stay perfectly intact, and you can try the stroke again.
How do I adjust the umbrella scale for short, square nails?
For shorter square nails, widen the dome slightly and shorten the handle. Instead of starting the top of the umbrella all the way up near the cuticle, start it closer to the middle of the nail bed. This ensures you have enough room for the bottom hook without crowding the free edge.
Why did the Gairriy red gel bubble under the lamp?
Bubbling usually happens when the color gel is applied too thick, which prevents the UV/LED light from penetrating all the way through to the base. For freehand art with highly pigmented gels like Gairriy, keep the gel on your liner brush very thin. If you need it to be darker, it is always better to cure one thin layer and trace over it a second time.”