
We have all had those moments, staring at a blank nail, wanting something a little more special than a solid color, but not anything heavy or overly complicated.
When clients sit in my chair feeling completely stuck for ideas and tired of the usual French tips, I love suggesting something delicate yet meaningful.
This elegant heartbeat wave design is the one I keep coming back to. It is incredibly popular at my salon right now, and every time I share this specific wave design with a new client, they cannot believe how approachable it actually is.
It looks beautiful on literally everyone, regardless of age or style, and it adds just the right amount of romantic flair to a simple nude base.
I am going to walk you through it step by step using a few basic tools you can easily find online.
Key Takeaways
Before we get into the full tutorial, here is a quick summary of what you need to know:
- This heartbeat nail design pairs a nude or light pink gel base with a thin red liner detail.
- You only need a size 1 liner brush to draw both the wave peaks and the heart shape.
- The full look takes roughly 20 minutes from base coat to finished top coat.
- It works beautifully on square, almond, and rounded nail shapes.
- Beginners can absolutely do this gel nail art at home with a little patience.
- It is a perfect choice for Valentine’s Day, date nights, or any time you want a romantic and elegant manicure.
- If a line comes out wrong, simply wipe it off before curing. Gel gives you time to fix mistakes.
Tools and Products You Will Need
Before starting, set everything out where you can reach it without shuffling around mid-design.
I always arrange my products before I touch a single nail because working on fine detail means both hands need to stay steady.
- Base Coat: Vinimay Base Coat (UV and LED soak-off formula for a durable, long-lasting foundation)
- Background Color: Light pink or nude gel color
- Art Color: Gairriy Color Gel in Red (a rich, saturated red that is perfect for the heart motif)
- Brush: Size 1 liner brush (the only tool you need for detailed nail art like this)
- Finish: Glossy top coat for high shine and longevity
- Equipment: UV or LED nail lamp
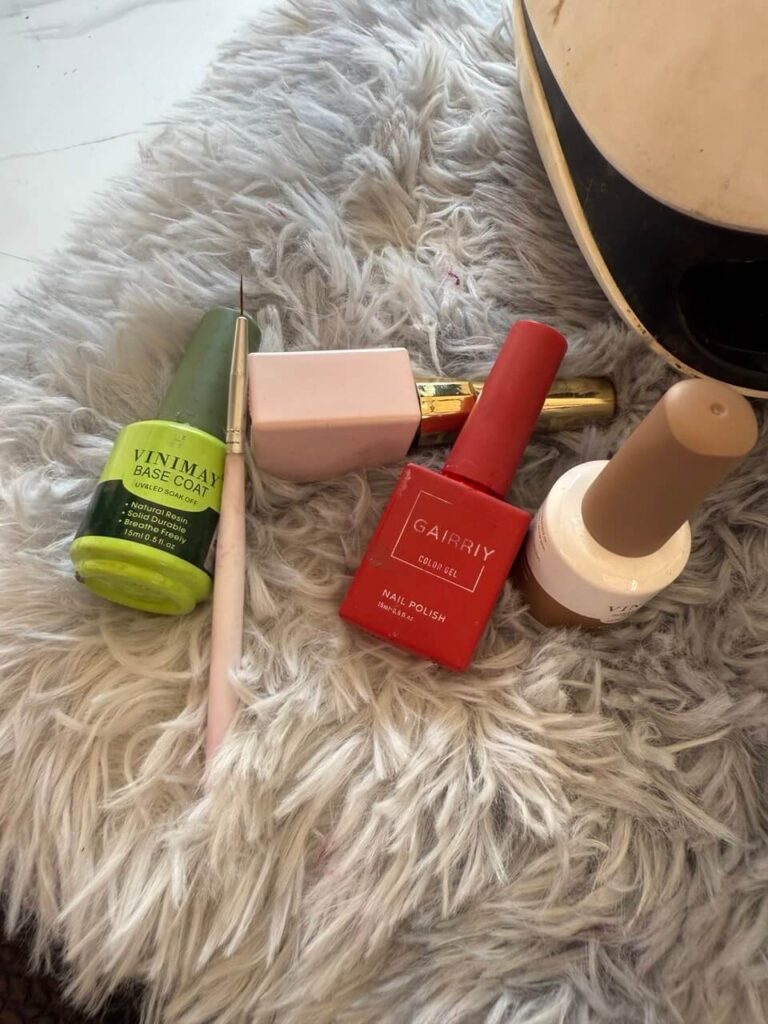
The first photo shows exactly how my setup looks before I start.
The Vinimay base coat sits on the left, the liner brush lies across the center, the pink gel swatch and red Gairriy color gel are ready to go, and the top coat is standing by on the right, with the UV lamp partially visible in the corner.
Clean, organized, and ready.
That kind of setup makes liner brush nail art so much less stressful, especially when you are learning.
How to Create the Heartbeat Nail Art Tutorial Step by Step
Step 1: Prep the Canvas
Shape the nails to your preferred style.
Both pointed and square shapes look stunning with this design.
Gently buff the surface of each nail until it is completely smooth and free of shine.
This step matters more than most beginners realize, because any remaining gloss on the nail surface will cause the gel to lift sooner than it should.
Step 2: Build the Foundation
Apply an even layer of Vinimay Base Coat across the entire nail, including the free edge, and cure under your LED lamp (I use a 48W) for 30 seconds.
The base coat is what gives your gel manicure its staying power, so do not rush through this stage.
Step 3: The Perfect Nude Pink Base
Apply one layer of your light pink or nude gel color to give the nail a soft, natural background.
Cure under the lamp for 30 seconds. Follow with a second coat of the pink gel and cure for another 30 seconds.
Two coats give you a flawless, even finish, and that clean nude base is exactly what makes the red heartbeat wave pop so beautifully against it.
Step 4: Draw the Heartbeat Wave into a Heart
This is the part that makes the whole design worth it, and it is more forgiving than it looks.
Dip your size 1 liner brush into the red Gairriy Color Gel.
Wipe off most of the product, leaving just a thin coat on the bristle tips.
Starting about a third of the way across the nail, draw the jagged peaks of a heartbeat wave and then guide the line naturally into the shape of a heart on the right side of the nail.
In the second photo, you can see exactly where I am at this stage.
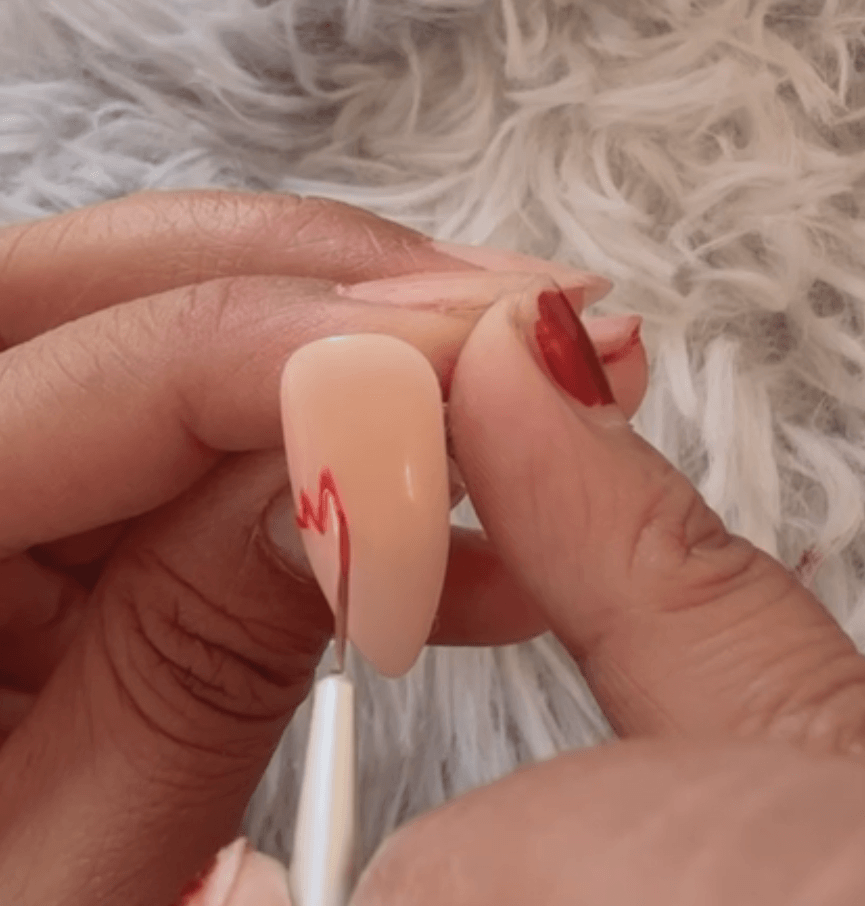
The brush is tracing the wave peaks while my pinky rests lightly against my finger for stability.
That tiny anchor point is everything when you are working on a detail this small.
The movement feels a little like writing a continuous signature once you settle into the rhythm of it.
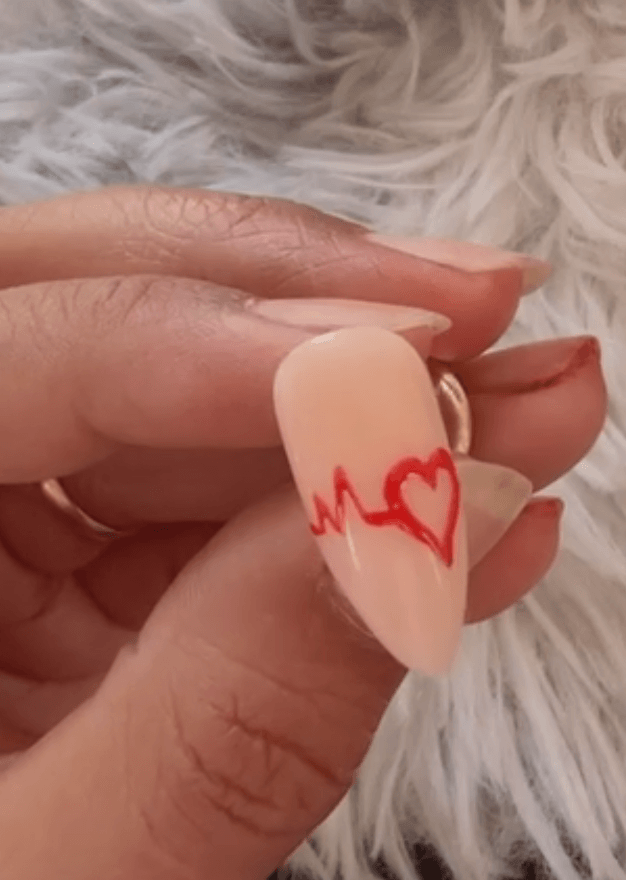
By the third photo, the heart is fully outlined, and the connection between the EKG wave and the heart shape is clear.
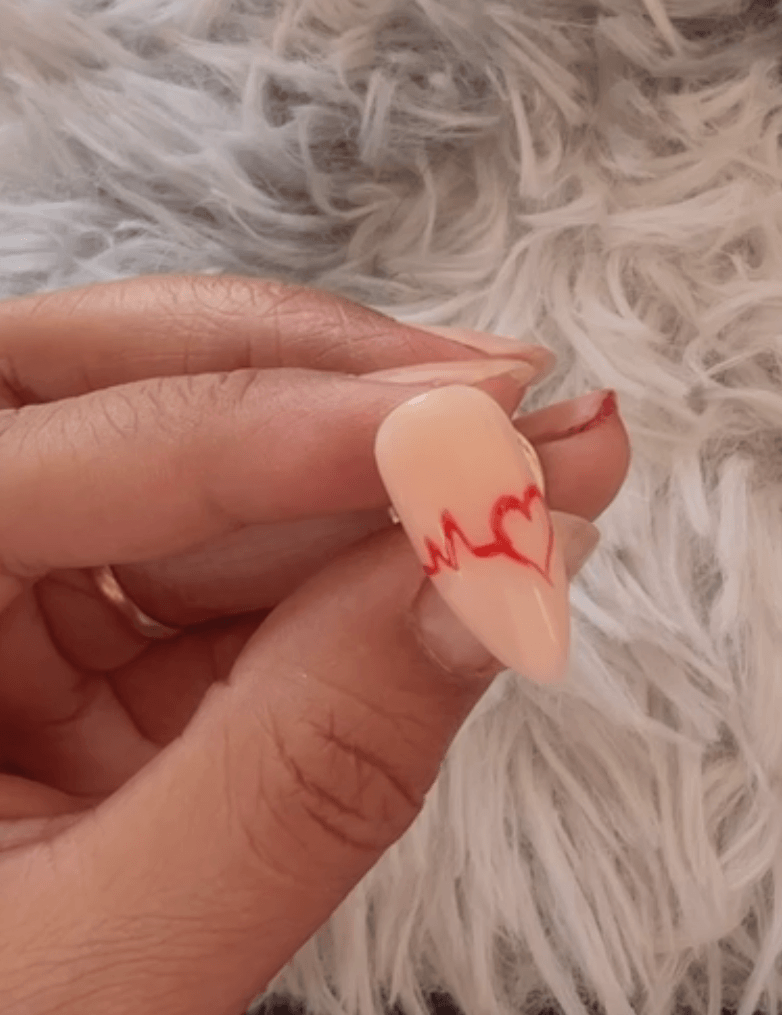
That flowing transition from heartbeat line to heart is what makes this design feel different from a plain heart nail.
The heartbeat wave gives it something to say.
Once your lines look exactly how you want them, cure under the lamp for 30 seconds to set the artwork in place.
Step 5: Seal and Shine
Apply one or two layers of glossy top coat, depending on how substantial you like the finish.
Give it one final cure under the lamp.
The fourth photo shows the completed look: a clean, glossy nude base with the red heartbeat wave flowing into a heart, sealed and ready.
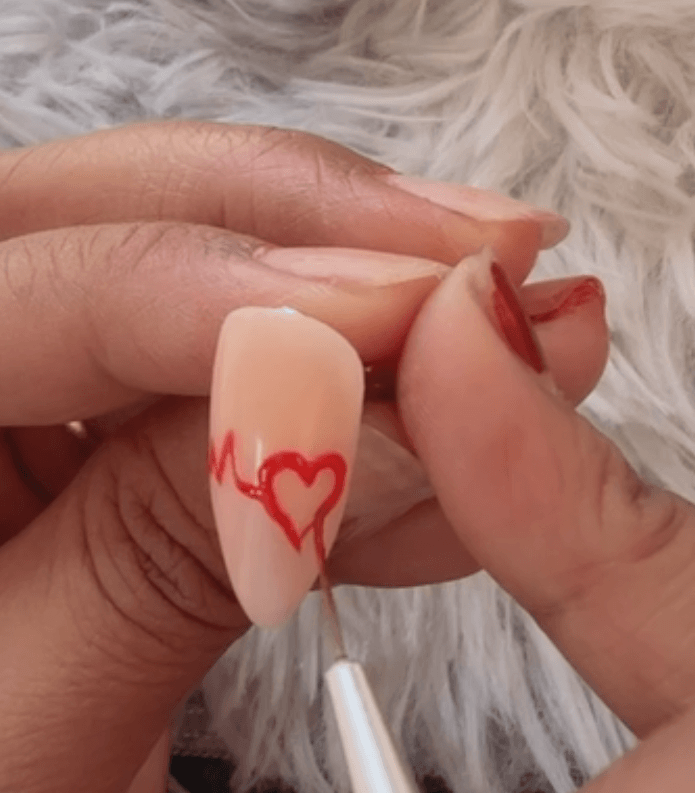
That is the whole design, start to finish.
Two Variations of This Look
Most of my clients choose between two versions when they sit down for this style.
The first is the full EKG heartbeat wave that flows into the heart, which is what we just built together.
The second is a simpler option: a single clean horizontal line that curves into a heart at the end, with no zigzag peaks at all.
That straight line heart version is even faster and works really well if you are doing all ten nails rather than just an accent nail.
If you are new to using a liner brush, I recommend starting with the straight line version first.
It trains your hand to stay steady and helps you understand how the brush responds with gel before you add the wave detail.
Most of my clients who practice that version for one session pick up the full heartbeat design easily the next time.
Tips for Drawing Clean Lines as a Beginner
Drawing the peaks of the heartbeat wave can feel a little tricky the first time.
Here is what I tell anyone learning this gel nail art at home:
- Use less product on the brush. Wipe most of the gel off before you start. A thinner coat on the bristles gives you a finer, more controlled line and prevents blobbing at the start of your stroke.
- Find an anchor point. Rest your pinky finger on the nail or brace the side of your hand against the table. Even a small physical anchor makes your lines steadier immediately.
- Go slowly. Gel does not dry until it hits the lamp, so there is no rush. Slow, intentional strokes always come out cleaner than rushed ones.
- Fix mistakes before you cure. If a line goes off track, wipe it with a clean brush dipped in gel cleanser before curing. You can redraw the heartbeat detail as many times as you need to before the lamp touches it.
- Practice on a nail tip first. If you have any spare nail tips or a practice hand, spend five minutes drawing lines on those before you work on your actual nails. The confidence you build in those five minutes carries over directly.
This is one of those designs that genuinely gets easier the second time.
I have watched complete beginners get it right on their second or third attempt.
Do not let the wave detail intimidate you.
Final Thoughts
The reason this heartbeat nail art tutorial keeps coming back as a client favourite is straightforward.
It looks complex, but it is genuinely achievable at home with one brush and two gel colors.
The nude pink base keeps it wearable for everyday, the red detail makes it feel personal, and the EKG wave flowing into a heart gives the design a meaning that a plain heart nail simply does not carry.
Whether you go for the full heartbeat wave design or the cleaner straight line heart version, both are beautiful, and both will turn heads.
If you try this at home, I hope this walkthrough made the process feel less mysterious and a lot more doable.
Happy painting!
Frequently Asked Questions
What size brush works best for fine lines?
A size 1 liner brush is the right tool for this design. The long, fine bristles give you enough control to draw both the small wave peaks and the curved heart outline in one continuous line. A thicker brush makes the lines look heavy, and a shorter one is harder to guide smoothly across the nail.
Can I do this design without a UV lamp?
The gel products used in this tutorial do require a UV or LED lamp to cure properly. If you do not have one, you can create the same heartbeat nail design using regular nail polish with a liner brush, but the fine lines will take longer to dry and will be more prone to smudging before they set.
How long will this manicure last before chipping?
With proper prep, a quality base coat, and a glossy top coat, a gel manicure like this typically lasts two to three weeks without chipping. The top coat is especially important for protecting the thin liner details, since those are the most vulnerable part of the design.
Can I wear this design year-round?
Yes, absolutely! Swap the red for black or a tonal nude to make it a subtle, everyday look. It is a highly versatile minimalist accent nail. You can also swap the red gel for white or a tonal nude for a more subtle everyday version.
The design works well as a single accent nail or as a full ten-nail set, and it suits minimalist nail art trends that are popular right alongside bolder maximalist styles.
What are the best nail shapes for linear art?
Square and almond are both excellent choices. The flat surface of a square nail gives you more horizontal space to work across, while the tapered shape of an almond nail frames the design beautifully. Rounded nails work too, though very short nails may not have enough surface area for the full wave and heart to sit comfortably without crowding.
Is this tutorial beginner-friendly?
Yes, if you start with the straight-line variation first. It trains your muscle memory to keep a steady hand before you attempt the zigzag heartbeat peaks. The technique is the same either way. The heartbeat peaks just add a few more directional changes to the stroke, which is where the practice pays off.
Can I use any red gel color for this design?
You can, though the quality of the gel makes a difference when you are doing fine line work. A gel that is too thin tends to bleed or spread outside the lines, while one that is too thick can drag and lift as you draw. Gairriy Color Gel has a consistency that sits well on the bristle and flows cleanly, which is why I keep reaching for it for this kind of detailed nail art.