
Looking for a design that screams summer vibes?
You are in the right place.
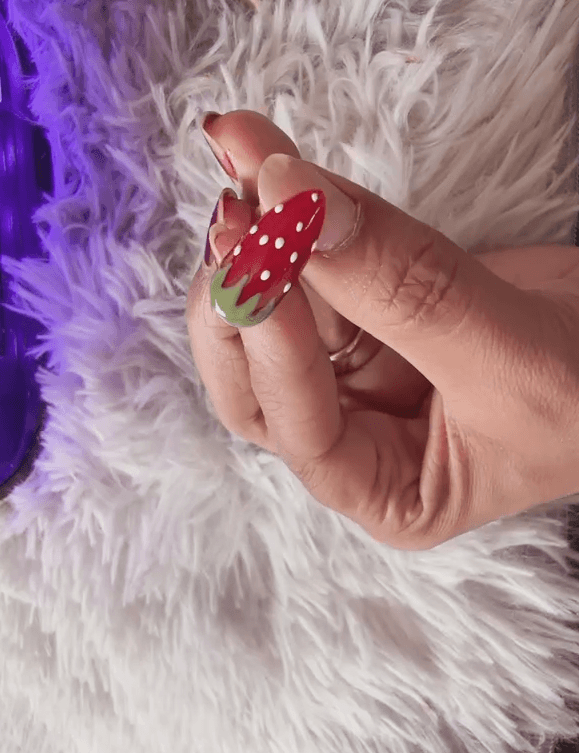
Fruit nail art designs are having a major moment in 2026, and right now, nothing is more fun or more requested at salons than strawberry nails.
I first tried this cute strawberry nail art design on a quiet Saturday afternoon when I had nothing but time, a fresh set of gel polishes, and zero plans.
I was honestly intimidated at first — painting tiny leaves and little seeds on a nail the size of a thumbnail felt like it required some kind of art degree.
But I promise it does not.
Once I broke it down step by step, the whole thing clicked, and the result was so satisfying that I had to share exactly how I did it.
Whether you are a complete beginner or someone who has dabbled in gel nail art at home before, this strawberry nail art tutorial will walk you through everything clearly.
No guesswork, no frustrating surprises halfway through.
Let’s get into it.
Key Takeaways
- You only need five tools to recreate this look: a base coat, red and green gel polish, a top coat, a liner brush, and a dotting tool.
- This design works best on almond or square nail shapes.
- Each gel layer needs 30 seconds under a UV/LED lamp before moving to the next step.
- Varying the size of your white seed dots is the secret to making the strawberry look realistic.
- Total time from prep to top coat is roughly 30 to 40 minutes.
- This is one of the most popular fruit nail art designs for summer 2026 — and it is far easier to pull off than it looks.
What You Will Need
Here is everything you need to gather before you start:
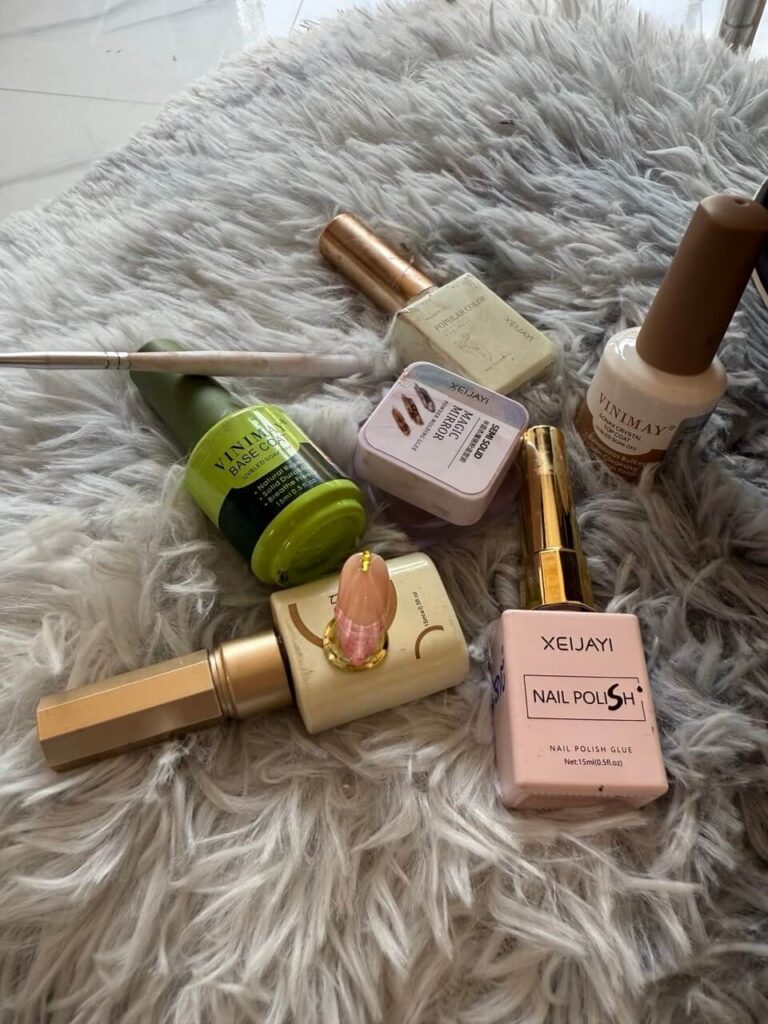
- Base Coat: This is non-negotiable for any gel nail art. It protects your natural nail and gives the polish something to grip. I use the Vinimay Base Coat, and it has never let me down — it cures evenly and helps everything last longer.
- Gel Polish (Red): You want a bright, juicy red here. Think ripe strawberry, not burgundy. The XEIJAYI gel polishes are my go-to for this design because the pigment is strong and you get full coverage in two coats.
- Gel Polish (Leaf Green): A medium, slightly warm green works best. You want it to read as a fresh strawberry leaf, not a Christmas ornament.
- White Gel: Just a small amount for the seeds. Any white gel you already own will work fine.
- Top Coat: A high-gloss formula makes the finished nail look like a real, shiny piece of fruit. The Vinimay Crystal Top Coat gives an incredible glossy finish.
- Liner Brush: A fine, pointed detailing brush is the key to painting clean leaves. Do not try to use a regular nail brush here — the precision makes a real difference.
- Dotting Tool: This is what creates those tiny, realistic-looking strawberry seeds. A metal dotting tool works better than a toothpick because you get more consistent dot sizes.
- UV/LED Lamp: Required to cure each layer of gel polish.
Strawberry Nail Art Step by Step
Step 1: Prep and Shape Your Nails
Before any polish touches your nails, take a few minutes to prep properly.
Shape your nails to your preferred style.
For this strawberry design, almond and square shapes both work beautifully — the elongated point of the almond shape actually makes the finished nail look even more like a real strawberry.
Once shaped, gently buff the surface of each nail.
This removes the natural shine and gives the gel polish something to bond to. Wipe away any dust with a lint-free pad.
Step 2: Apply Your Base Coat
Apply an even, thin layer of your base coat over the entire nail, making sure to cap the free edge (that means swiping the brush along the very tip of the nail too).
This small habit seriously extends how long your gel manicure lasts.
Cure under your UV/LED lamp for 30 seconds.
Your nails will feel slightly tacky — that is completely normal and exactly what you want.
Step 3: First Layer of Red Gel Polish
Apply a thin, even coat of your red gel polish over the entire nail.
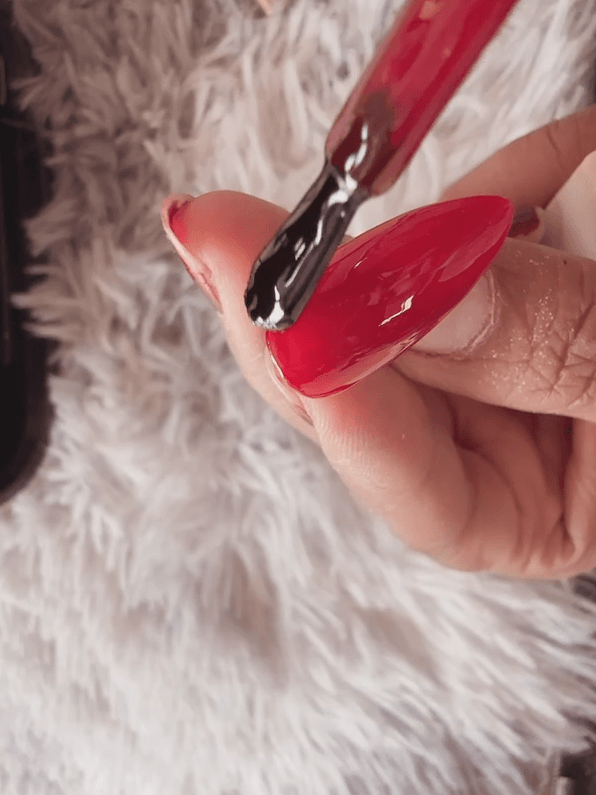
Thin layers are the key to a smooth, professional-looking result — thick layers tend to bubble or drag.
Make sure you cover the whole nail surface and cap the tip.
Cure for 30 seconds.
Step 4: Second Layer of Red Gel Polish
One coat of red rarely gives you full, rich opacity.
Apply a second thin coat of red gel to deepen the color and even out any streaks from the first layer.
By the end of this step, your nail should look like a deep, vibrant red with no patchy spots.
Cure again for 30 seconds.
Step 5: Paint the Strawberry Leaves
This is the step that makes the design.
Load your liner brush with leaf green gel, then start painting the strawberry calyx (the leafy crown) at the cuticle end of the nail.
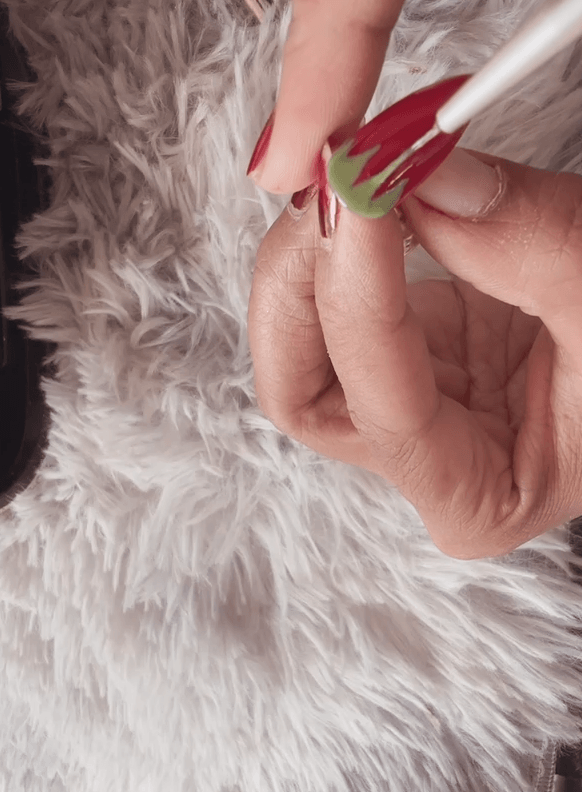
You are drawing a series of small, pointed zig-zag shapes that come down toward the center of the nail, just like the leaves on top of a real strawberry.
Work slowly.
You do not need to cure between the leaves and seeds steps — you can paint both before curing them together, which actually gives you more time to adjust if a leaf looks off.
A few tips that made this easier for me:
- Keep your liner brush strokes light and confident. Short, flicking motions create the pointed leaf tips much better than slow, careful drags.
- If a leaf goes wrong, a clean brush dipped in acetone can wipe it away before curing.
- The leaves do not have to be perfectly symmetrical. Real strawberry leaves are organic and uneven, so slight imperfections actually make it look more realistic.
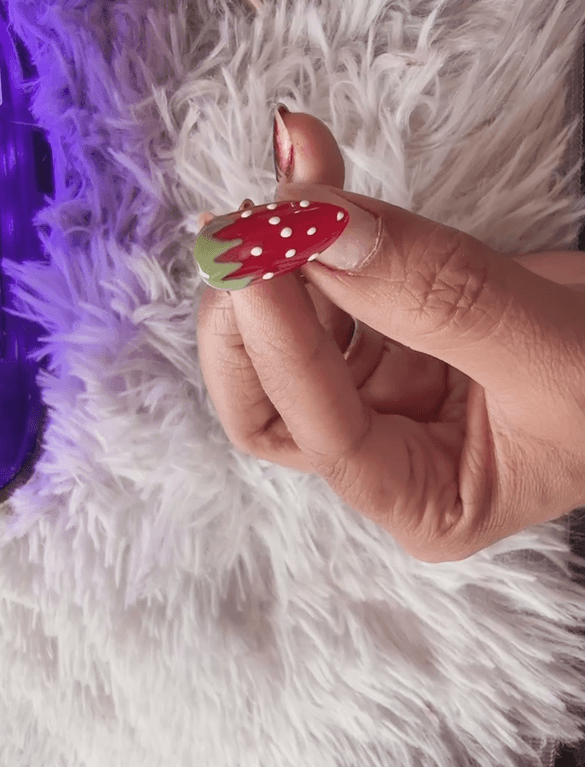
Step 6: Add the Strawberry Seeds
Dip your metal dotting tool into white gel polish and begin placing tiny dots across the red area of the nail.

Slightly varying the dot sizes makes the design look much more natural.
These are the strawberry seeds, and this step is honestly the most satisfying part of the whole process.
Scatter the dots somewhat randomly across the nail surface.
Try not to make them all the same size or perfectly spaced in rows.
Real strawberry seeds are slightly irregular, so a mix of sizes and an organic arrangement will make your design look far more professional than a perfectly gridded pattern.
Now, cure the leaves and seeds together for 30 seconds.
Apply your high-gloss top coat over the entire nail, making sure to cap the tip once more.
The top coat does two things: it protects your art from chipping, and it gives the nail that beautiful, glossy, just-picked-from-the-garden fruit finish.
Cure for one final 30 seconds, wipe off the tacky inhibition layer with a lint-free pad if your top coat requires it, and you are done.
Nail Tech Expert Tip
If you want your strawberries to look even more realistic, vary the size of your white dots slightly throughout the design.
Use slightly larger dots toward the center of the nail and smaller ones toward the edges and tip.
It mimics how seeds are distributed on a real strawberry and gives the finished design a natural, organic quality that looks more polished overall.
Why This Design Works So Well Right Now
Fruit nail art has officially moved beyond being a seasonal trend.
In 2026, it has become one of the most requested and searched styles, particularly the “micro fruit” approach, where tiny, precise fruit details sit against a clean base.
Strawberry nail art sits right in the middle of that sweet spot: it is recognizable, cheerful, and surprisingly wearable.
People love it because it is fun without being over the top, and it photographs beautifully on social media.
If you enjoy this style, you might also want to try cherry nail art or a mixed fruit manicure, where you paint a different fruit on each finger. Both use the same basic technique.
Conclusion
This strawberry nail art tutorial is proof that fruit nail art designs do not have to be intimidating.
With the right tools, a little patience, and the step-by-step process above, you can create a result that genuinely looks like it came out of a nail salon.
The liner brush work for the leaves is what trips most beginners up, but once you get the flicking motion down, it becomes second nature fast.
If you give this a try, I would love to see how yours turns out.
If you mastered this look and want another cute, beginner-friendly design to try, check out my step-by-step ladybug nail art guide. It uses a very similar dotting tool technique and is perfect for spring!
Happy painting!
Frequently Asked Questions
Is strawberry nail art hard for beginners?
Not at all. If you can paint a base coat and hold a small brush, you can do this design. The leaves look more complicated than they are — short flicking strokes with a liner brush handle most of the work. Start slowly and remember that small imperfections in the leaves actually make the design look more realistic.
What are other easy gel nail art designs for beginners?
If you enjoyed the simple dotting and brush techniques used for these strawberries, you will love creating insect or floral accents. A great next step is trying a simple ladybug gel design, which uses the exact same red base polish and metal dotting tool you already have out!
What nail shape is best for strawberry nail art?
Almond and square shapes both work really well. The almond shape naturally mirrors the elongated silhouette of a strawberry, which makes the finished design look especially convincing. Round nails work too, though the shape reads more like a round berry than a classic strawberry.
How do you make strawberry seeds on nails?
Use a metal dotting tool dipped in white gel polish. Place the dots with a light, dabbing motion rather than pressing hard. Vary the size slightly — some dots a little larger, some smaller — and space them in an organic, non-grid pattern for the most realistic result.
Can I do this design with regular nail polish instead of gel?
Yes, you can adapt this tutorial for regular polish. The main difference is drying time — you will need to let each layer dry fully before adding the next, and the design will not last as long without a gel formula. A good, regular top coat will help protect the finished art.
How long does this strawberry gel nail art last?
With proper prep and a solid base coat, a gel manicure like this typically lasts two to three weeks without chipping. Capping the free edge at every layer and using a good top coat makes a noticeable difference in longevity.
What other fruit nail designs go well with strawberry nails?
Cherry nail art, watermelon nails, and lemon nail designs all use similar techniques and pair beautifully with strawberry nails as accent nails. A mixed fruit manicure with a different design on each finger is a big summer 2026 trend right now.
Do I need an expensive UV lamp for gel nail art at home?
No. A basic LED nail lamp in the $20 to $40 range works perfectly well for curing gel polish at home. The key is to check that your lamp is compatible with the gel brand you are using — most modern LED lamps cure standard gel polishes in 30 to 60 seconds per layer.