
A client asked me for a fun spring design today, so between appointments, I grabbed a practice tip to break down my go-to ladybug tutorial for you step-by-step.
If you want a design that is absolutely adorable and eye-catching but does not require an art degree to pull off, you have come to the right place.
Today, I am sharing my go-to secret for spring: a super cute ladybug nail art tutorial using nothing but gel polish.
Whether you are a DIY queen treating yourself at home or a nail pro looking for a quick, high-impact design to offer clients, this step-by-step guide is your new best friend.
You will be surprised by how easy it is to get perfect results on your very first try.
Key Takeaways
- What this is: A complete, beginner-friendly ladybug nail art tutorial using gel polish only.
- Who it is for: Anyone doing gel nail art at home, or nail technicians wanting a fast, crowd-pleasing spring design.
- Skill level: Beginner. If you can hold a brush, you can do this.
- Time needed: Around 30 minutes from prep to finished seal.
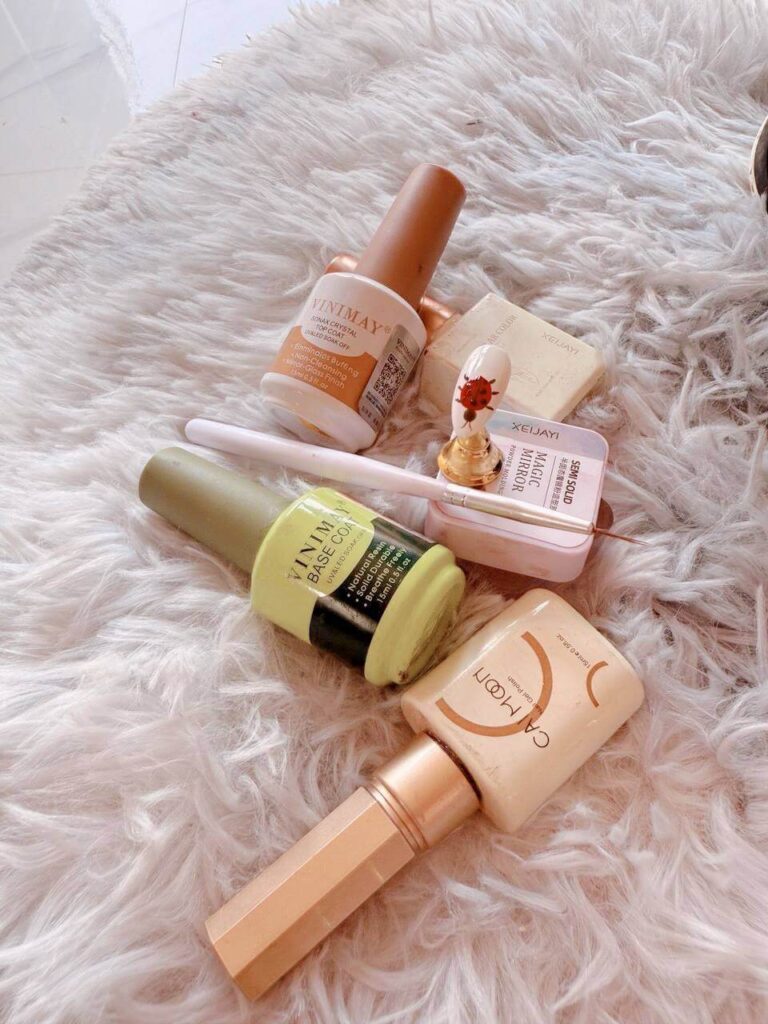
What You Will Need
Before we get started, gather everything within reach.
Having your supplies ready makes the whole process faster and prevents the gel from moving while you work.
I personally use VINIMAY Base and Top Coat, and the XEIJAYI semi-solid palette for the details, but any high-quality gel brand will work.
- Base coat to protect your natural nail and create a smooth, adhesive surface.
- Top coat for that glassy, long-lasting finish that seals everything in.
- Gel polish in three colors: White for the base, Red for the ladybug body, and Black for the fine details.
- Detailing or a liner brush for creating sharp lines and tiny spots.
- UV or LED nail lamp to cure the gel at each step.
How to Do Ladybug Nail Art at Home: Step-by-Step Gel Polish Tutorial
Step 1: Prep and Base Coat
Start by cleaning up your cuticles and filing your nails to your preferred shape.
Proper nail prep is the step most beginners skip, and it is also the main reason most manicures lift or chip early.
Take your time here.
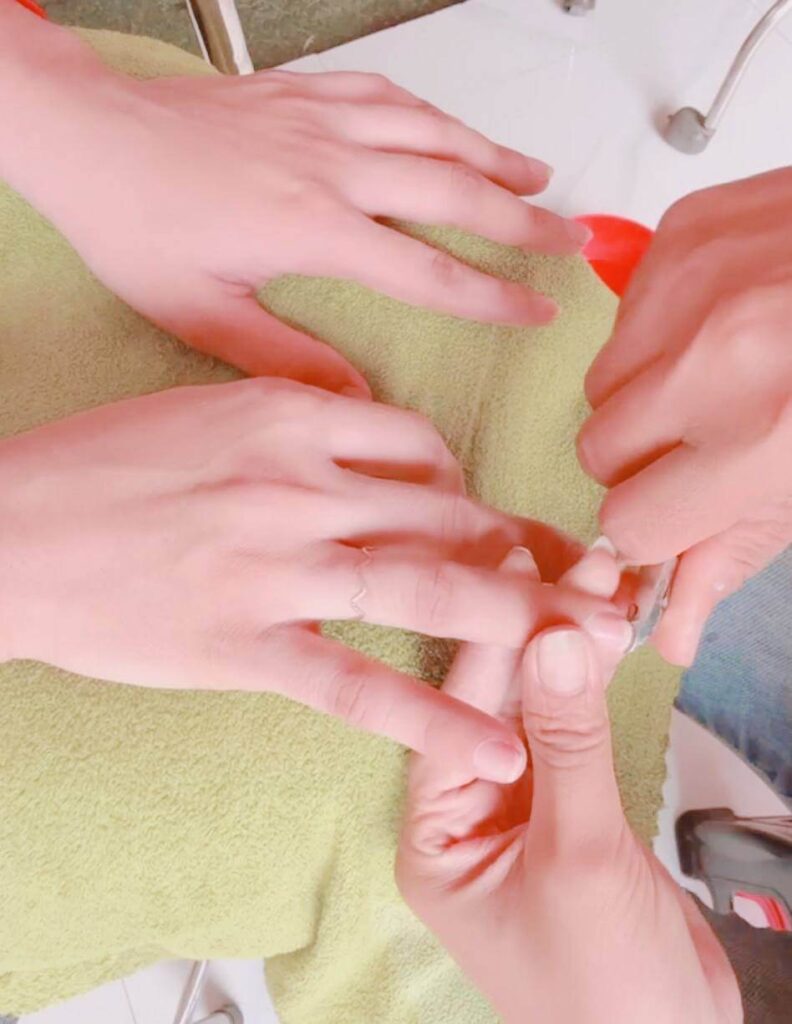
Once your nails are prepped, apply a thin, even layer of base coat and cure it under your UV or LED lamp for 30 seconds.
This sets a protective foundation and helps the color stick.
Step 2: Apply the White Base Color
Apply a smooth layer of white gel polish over the entire nail.
This creates a bright, clean canvas that makes the red and black pop beautifully.
Cure for 30 seconds.
Quick tip: If your white gel is a little sheer, do two thin coats instead of one thick one, curing between each.
Thin layers always cure more evenly and last longer.
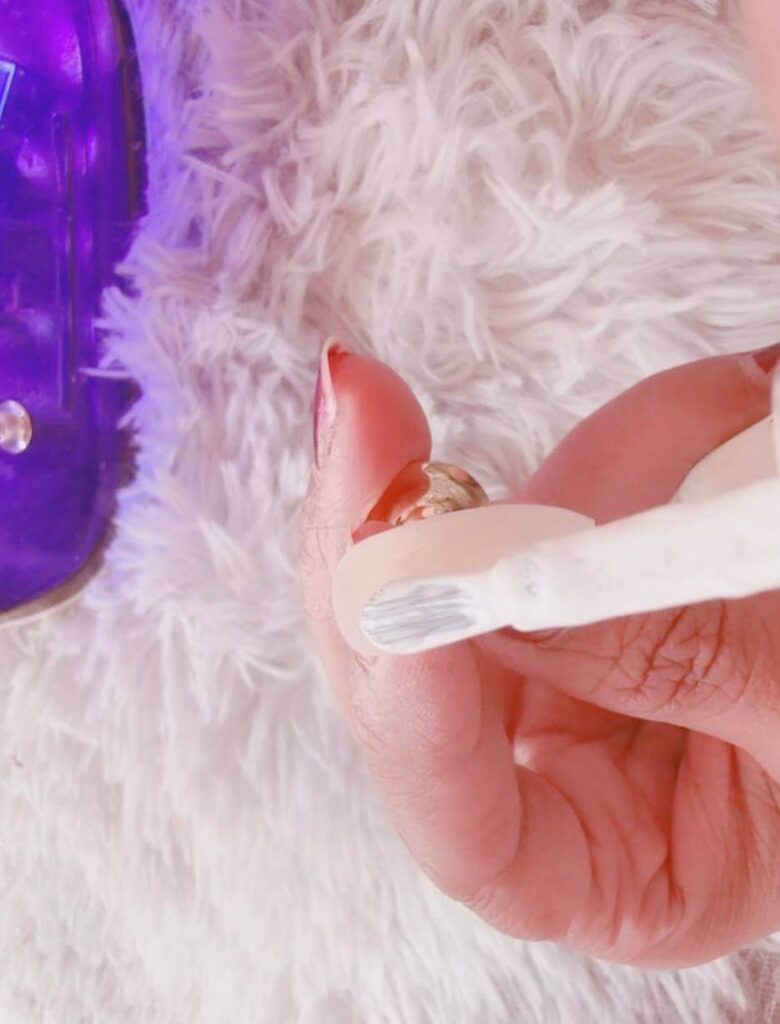
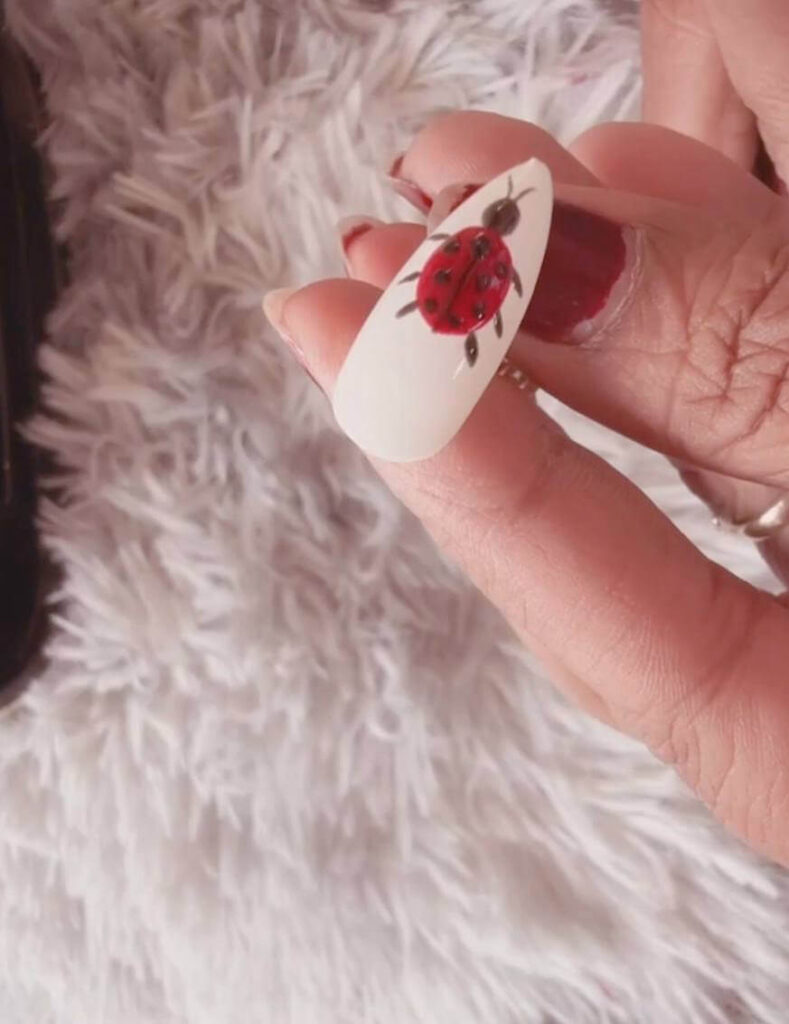
Step 3: Paint the Ladybug Body
Dip your detailing brush into the red gel polish.
Carefully paint a rounded, oval shape in the center of the nail to form the ladybug’s body.
Keep this layer thin so it does not run or pool at the edges.
This is the step where the design really starts to come alive.
Do not worry about being perfect on your first stroke.
You can clean up the edges before curing.
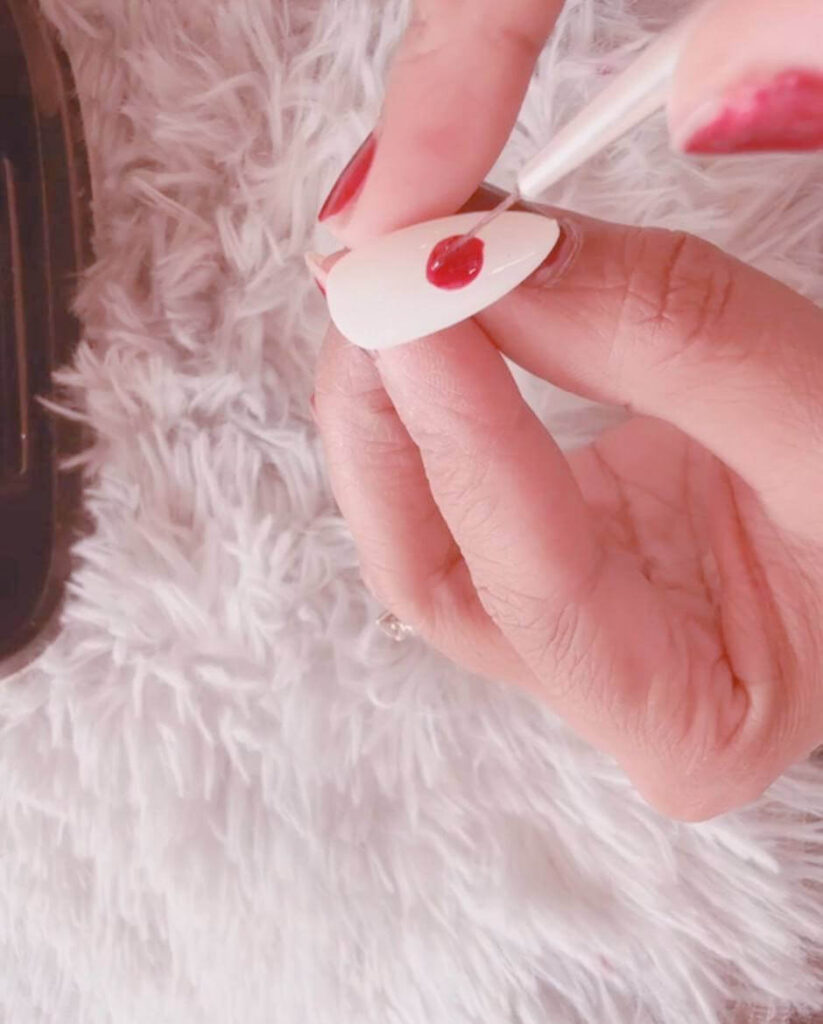
Step 4: Add the Details
Using the same brush (cleaned thoroughly first) and your black gel polish, paint a small half-circle at the top of the red oval to form the head.
Then, draw a super thin line straight down the center of the red body to split the wings. Finish by dotting on the classic ladybug spots and adding two tiny antennae at the top.
This is the step most people worry about, but it is more forgiving than it looks.
The spots do not have to be identical—real ladybugs are not symmetrical either!
Step 5: Cure the Design
Place your hand back under the UV or LED lamp and cure for a full 30 seconds to lock in your artwork.
Do not skip this step between the red and black layers.
Curing keeps the colors crisp and prevents them from bleeding into each other.
Step 6: Seal with Top Coat
Apply a generous final layer of top coat over the entire nail to lock in the art and give it a glossy, salon-quality finish.
Cure for 30 seconds, and you are done.
Pro Tips from a Nail Tech for Flawless Results
I have painted hundreds of nails over the years, and these are the small habits that separate a good design from a great one:
- Always clean your brush between colors: When switching from red to black, wipe your liner brush completely clean with a lint-free wipe and a little nail cleanser. If any red residue is left on the brush, your black details will turn muddy instead of sharp.
- Use the flash cure technique: Gel polish loves to move around. If your red oval starts drifting before you can add the black details, pop your nail into the lamp for just 5 to 10 seconds right after painting it. This quick flash cure locks the shape in place without fully curing the layer, so you still have a workable surface for the details.
- Keep your strokes confident and minimal: Overworking gel polish can pull it off the nail or create streaks. One or two deliberate strokes are better than five cautious ones.
- Thin layers, always: Thick gel polish does not cure properly all the way through, which leads to peeling and a shorter wear time. Think of it like frosting a cake: multiple thin, even passes are always better than one heavy layer.
Why Ladybug Nails Are the Perfect Spring Choice
If you have been scrolling nail feeds lately, you have probably already seen ladybug designs popping up in salons everywhere.
What makes the ladybug motif so highly requested right now is how playful and versatile it is.
It fits naturally with the bright, cheerful vibe clients want when the weather warms up, and it works flawlessly on any nail shape from short ovals to longer almonds.
It is a fun, fresh take on the classic polka dot style, giving you a detailed look without being intimidating to wear.
It is colorful, cheerful, fast to recreate, and completely perfect for the season.
Conclusion
Now it is your turn. Grab your liner brush, pull out your red and black gel, and give this ladybug nail art tutorial a try.
It is one of those designs that looks far more impressive than the effort it takes, which makes it perfect for a quick seasonal refresh.
If you recreate this look at home or on a client, tag me in your photos! I would genuinely love to see how your spring ladybugs turn out.
Frequently Asked Questions
Does ladybug nail art work on short nails?
It works well on any length! On shorter nails, simply scale the ladybug body down slightly so it fits the nail surface comfortably. The oval shape actually looks exceptionally charming on short, round, or squoval nail shapes.
How do I do this without dedicated dotting tools?
You only need a thin detailing or liner brush, which most nail starter kits already include. No dotting tool is required. Use the very tip of the brush for the spots and antennae, and the flat edge to pull the center line down the back. The design is highly forgiving.
Why did my black ladybug spots bleed into the red body?
This usually happens for two reasons: either the red gel layer was painted too thickly, or you forgot to cure the red body before adding the black details. Always make sure to flash-cure your base shapes so the wet gels do not mix and smear together.
Can I recreate this with regular nail polish instead of gel?
Yes, but you must be incredibly patient. You have to wait for the red polish to dry completely (at least 10–15 minutes) before adding the black details. If you try to paint wet regular polish over wet regular polish, the colors will instantly smear and drag.